This is the app walkthrough. Once you’re comfortable clicking around and want
to learn the Vadalog language itself, continue with
Your First Project and the
Vadalog Reference.
Step 1 — Get your bearings
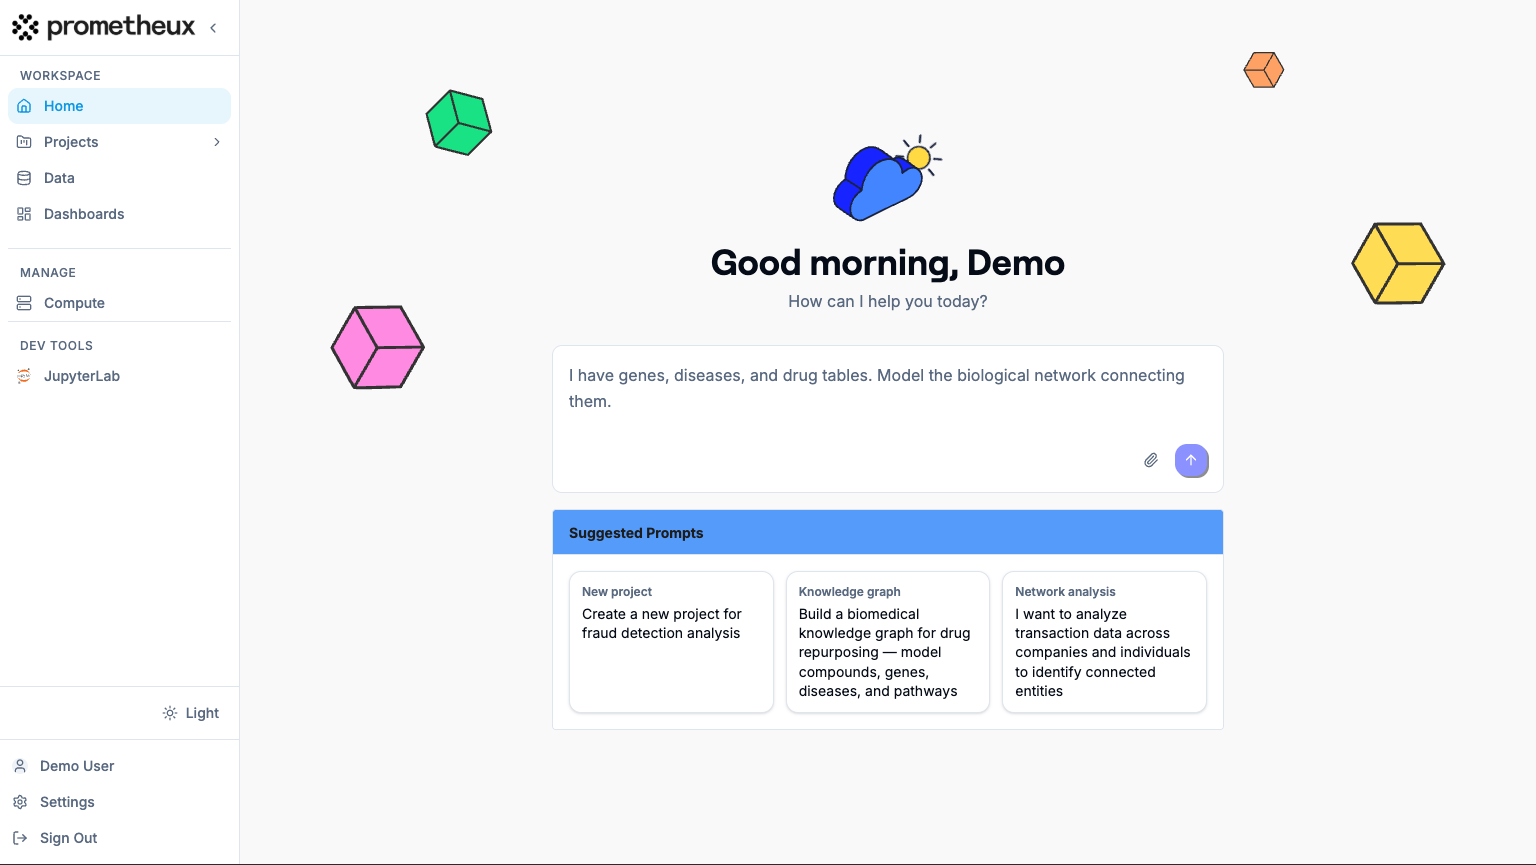
After signing in and completing the “Complete your profile” screen, you land in your workspace. The home screen centers on the AI Assistant, and the left sidebar is how you move around:| Sidebar item | Where it takes you | What it’s for |
|---|---|---|
| Home | / | The AI Assistant — ask questions or have it build things for you. |
| Projects | /projects | Create and open projects (where your work lives). |
| Data | /datasources | Connect data sources and upload files. |
| Dashboards | /dashboards | Build visualizations over your project output. |
| Apps | /apps | Published apps built on your dashboards. |
| Settings | /settings | Profile, API keys, models, and preferences. |
Step 2 — Connect your data
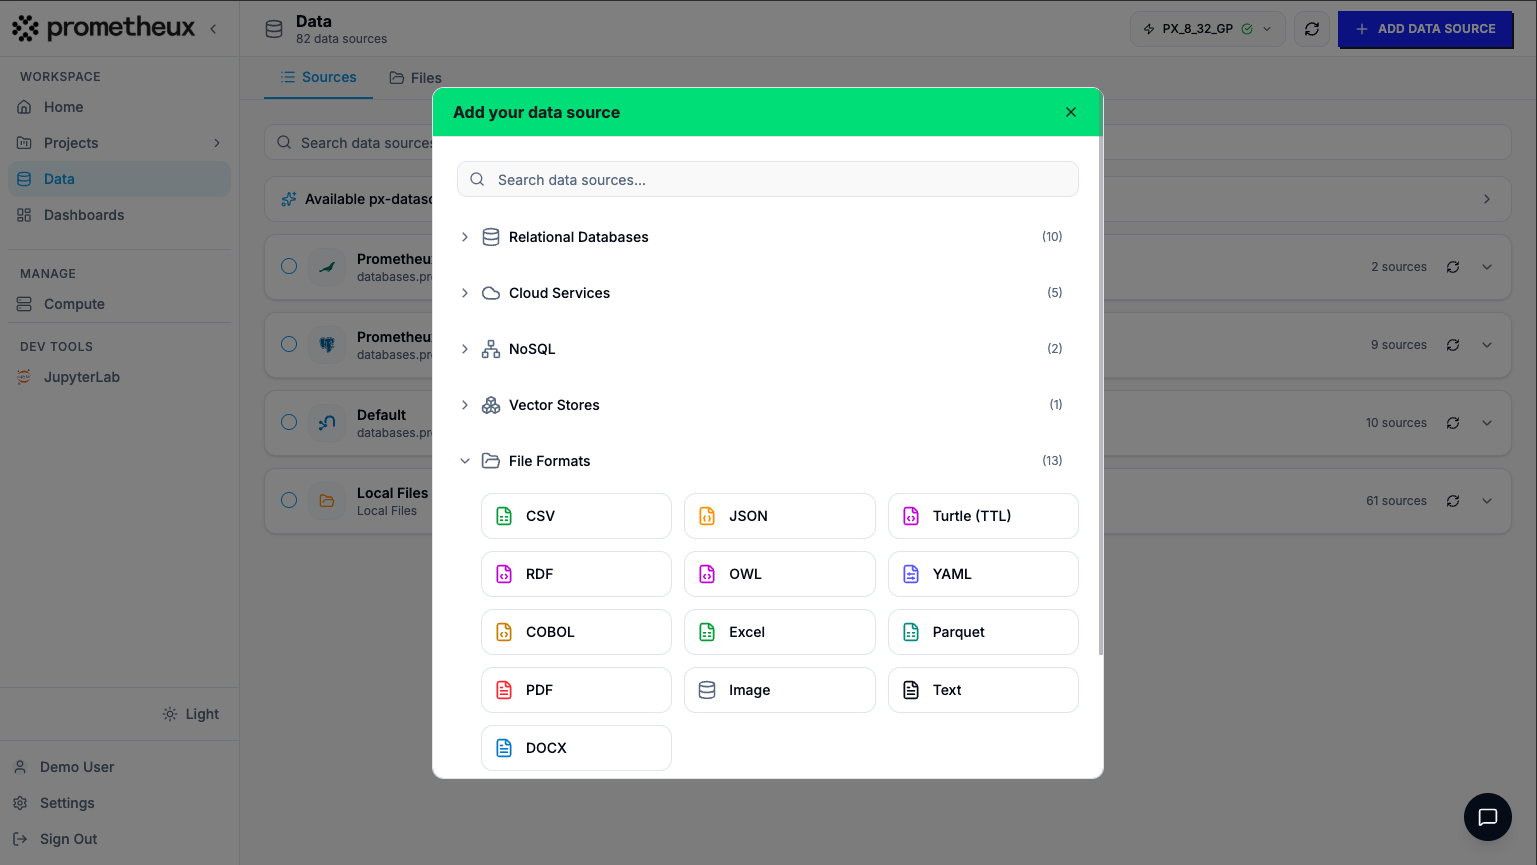
Open Data (/datasources) from the sidebar. This page has two tabs:
Sources (database connections) and Files (uploads).
Open the connection dialog
Click Add Data Source. The “Add your data source” dialog opens with a
searchable, categorized list of connectors — Relational Databases
(PostgreSQL, MySQL, SQL Server, Oracle, …), Cloud Services (Snowflake,
Databricks, BigQuery, Redshift, …), NoSQL (MongoDB, Neo4j),
Vector Stores, and File Formats (CSV, JSON, Parquet, Excel, …).
Pick a connector and fill in the details
Select your source type and complete the connection form. Fields vary by
type — for example, Snowflake asks for Username, Password,
Account URL, Database, and an optional Warehouse; PostgreSQL asks
for Host, Port, Database, Username, and Password.
No data handy? Use a demo source
On a fresh workspace, expand “Available px-datasources — no setup needed”
and pick a read-only Prometheux dataset. It opens the connection form
pre-filled — just review and connect, so you can explore the platform before
wiring up your own systems.
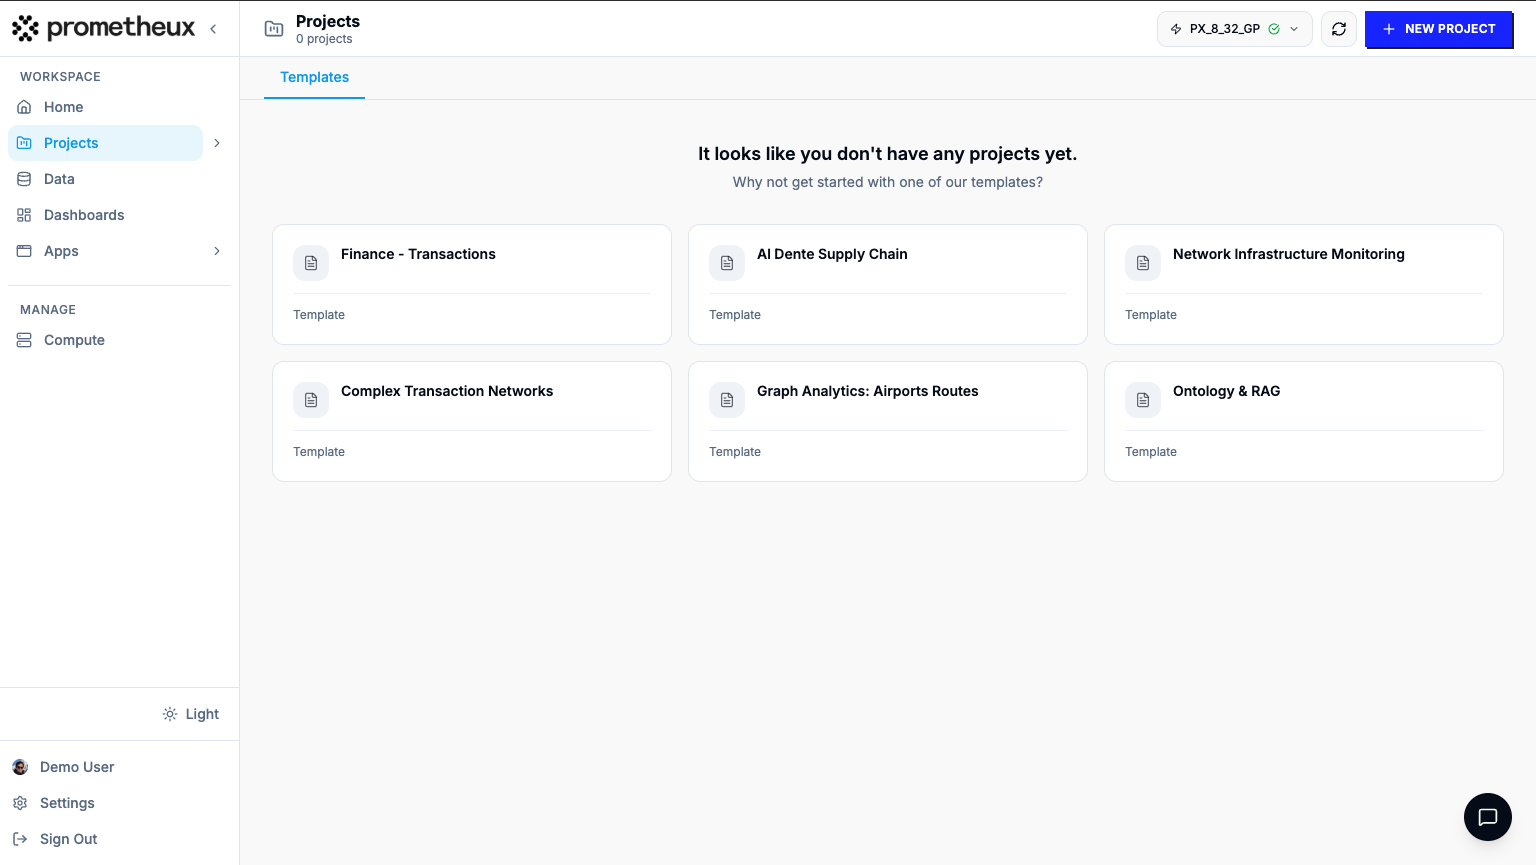
Step 3 — Create a project
A project is your workspace for turning data into answers — it holds your concepts, ontology, and dashboards. Open Projects (/projects). On a new account you’ll see
“It looks like you don’t have any projects yet.”
Start a new project
Click New Project (top-right). In the dialog, stay on the Create tab
and fill in:
- Name — e.g. Company Ownership
- Description (optional)
- Context (optional) — a few notes about the project’s goal; the AI Assistant reads this on every turn.
- Scope — leave as User Scope.
Step 4 — Define your first concept
Inside the project editor, the Explorer panel on the left lists your concepts — the logic that transforms data into results.Choose how to express it
Pick a concept type: Logic (Vadalog, the default), SQL, Cypher,
or Python. Write your logic in the editor.
Let the assistant write it for you (optional)
Type a plain-English description of what you want, then click the
✨ Generate Vadalog from natural language button. Prometheux drafts the
Vadalog for you; edit it as needed.
New to Vadalog? The Your First Project
tutorial teaches the language step by step, and the
Vadalog Reference is the full guide.
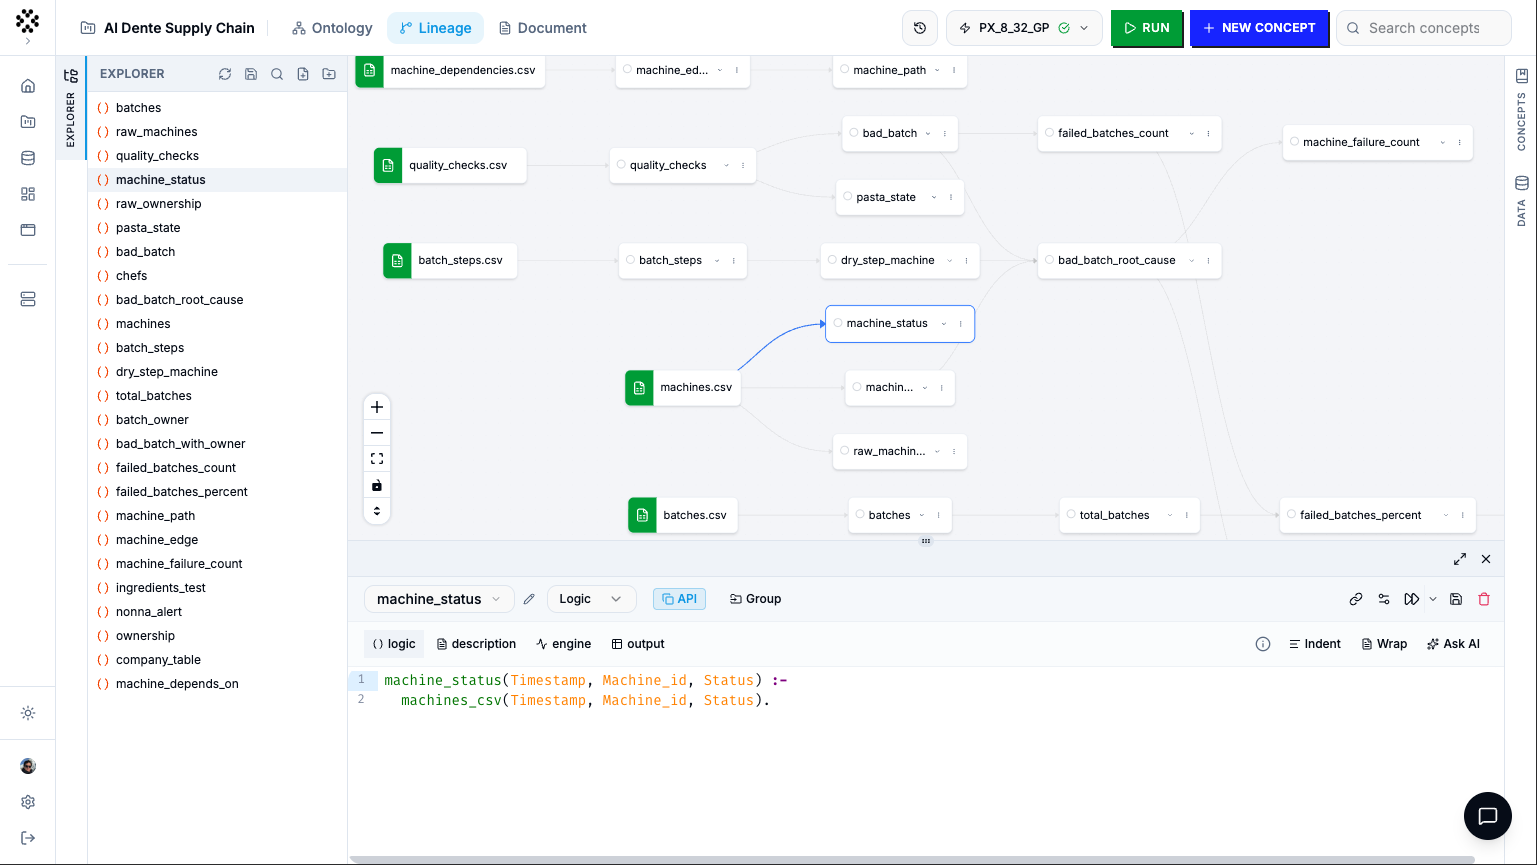
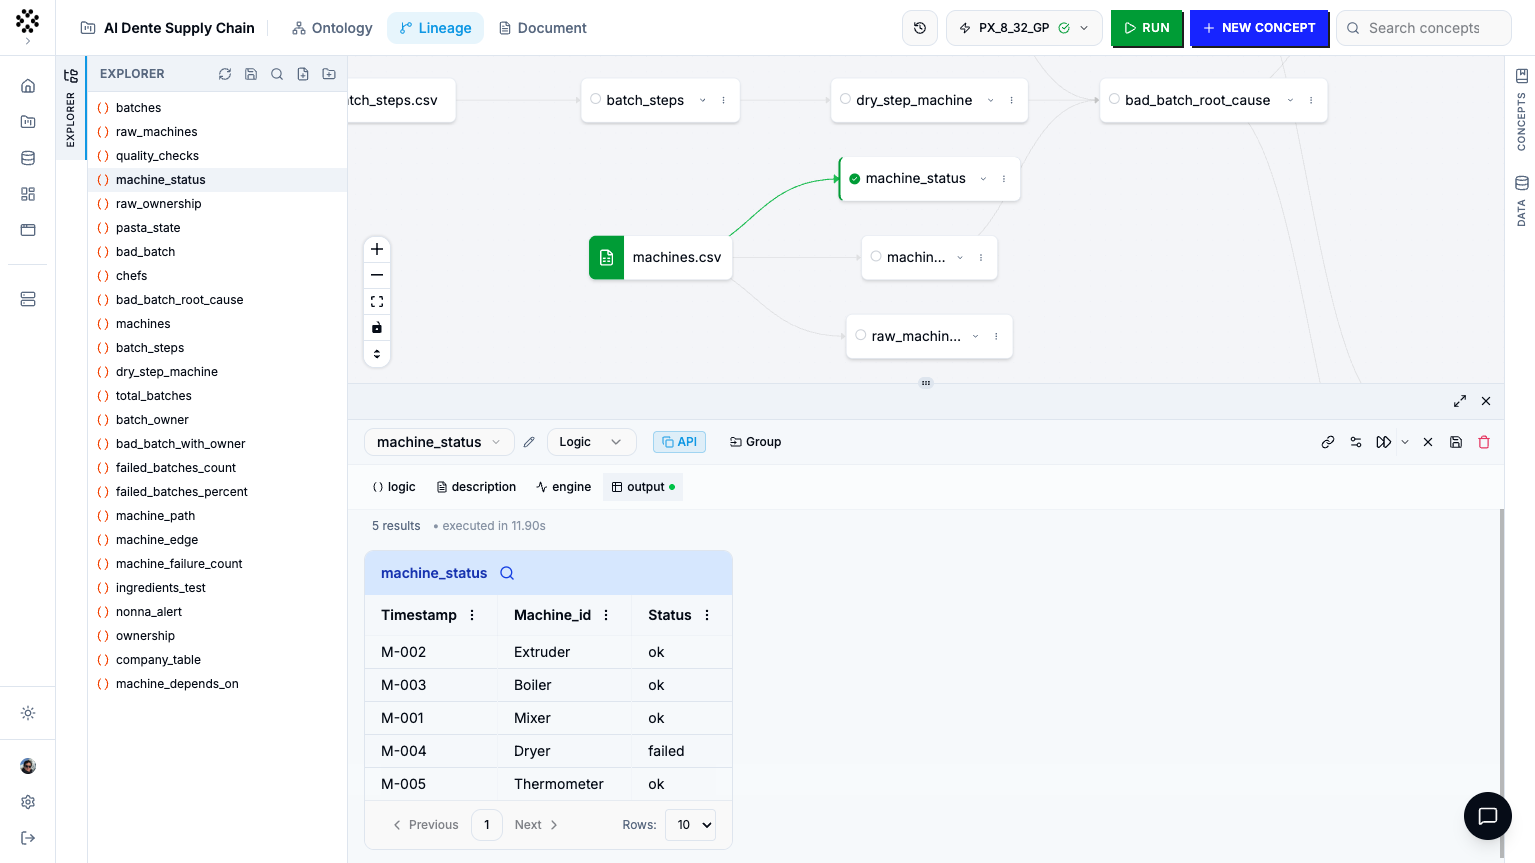
Step 5 — Run it and explore the results
With a concept saved, run it from the cell toolbar:- Run cell executes just the current concept.
- Run workflow runs the concept together with everything it depends on.
- Page through rows (Prev / Next, with a Rows size selector).
- Search across columns and apply per-column filters (
contains,equals,<,>, …).
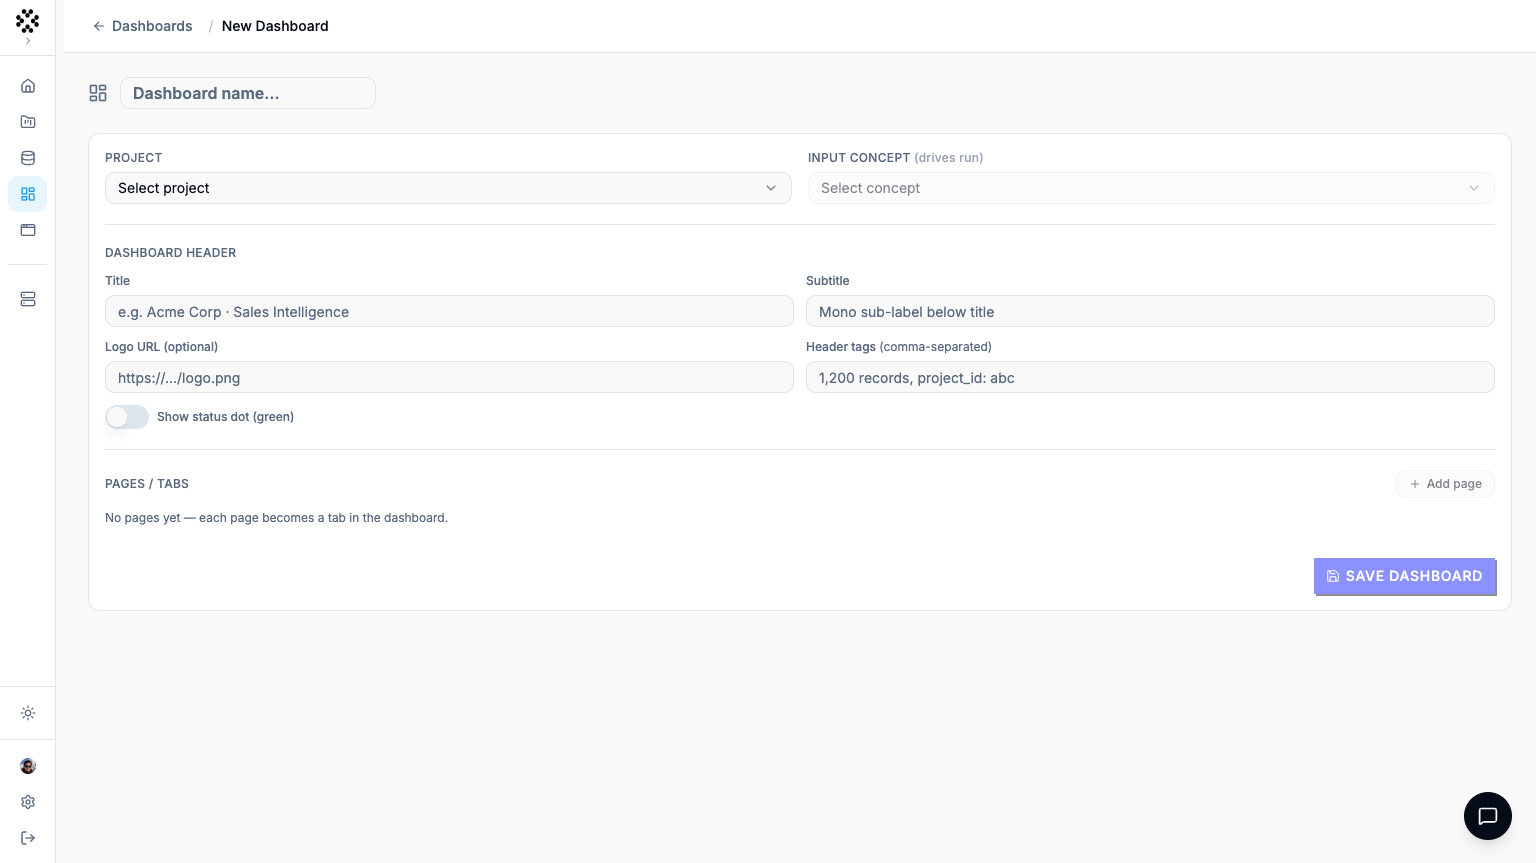
Step 6 — Build a dashboard
Now turn your results into something shareable.Point it at your project
In the config panel, choose your Project and an Input concept (drives
run) — the concept whose run produces the data your widgets display. Set a
Title and any header details.
Lay out pages, sections, and widgets
Click Add page for a tab, Add section within it (choose Single,
Two columns, or Four columns), then Add widget. Pick a widget
type — Table, Line chart, Pie chart, or Progress bar — and
select the Concept it visualizes. For charts, map the X axis / Y
axis (or label / value) columns.
What’s next
You’ve gone from an empty account to a running project and a live dashboard. From here:Learn Vadalog
Write your own reasoning rules with the step-by-step language tutorial.
Connect more data
Wire up Snowflake, Databricks, SQL databases, and files.
Use the AI Assistant
Have the assistant generate and debug concepts for you.
Automate & integrate
Drive the platform from the REST API, Python SDK, or MCP.